Data engineer 101: How to build a data pipeline with Apache Airflow and Airbyte
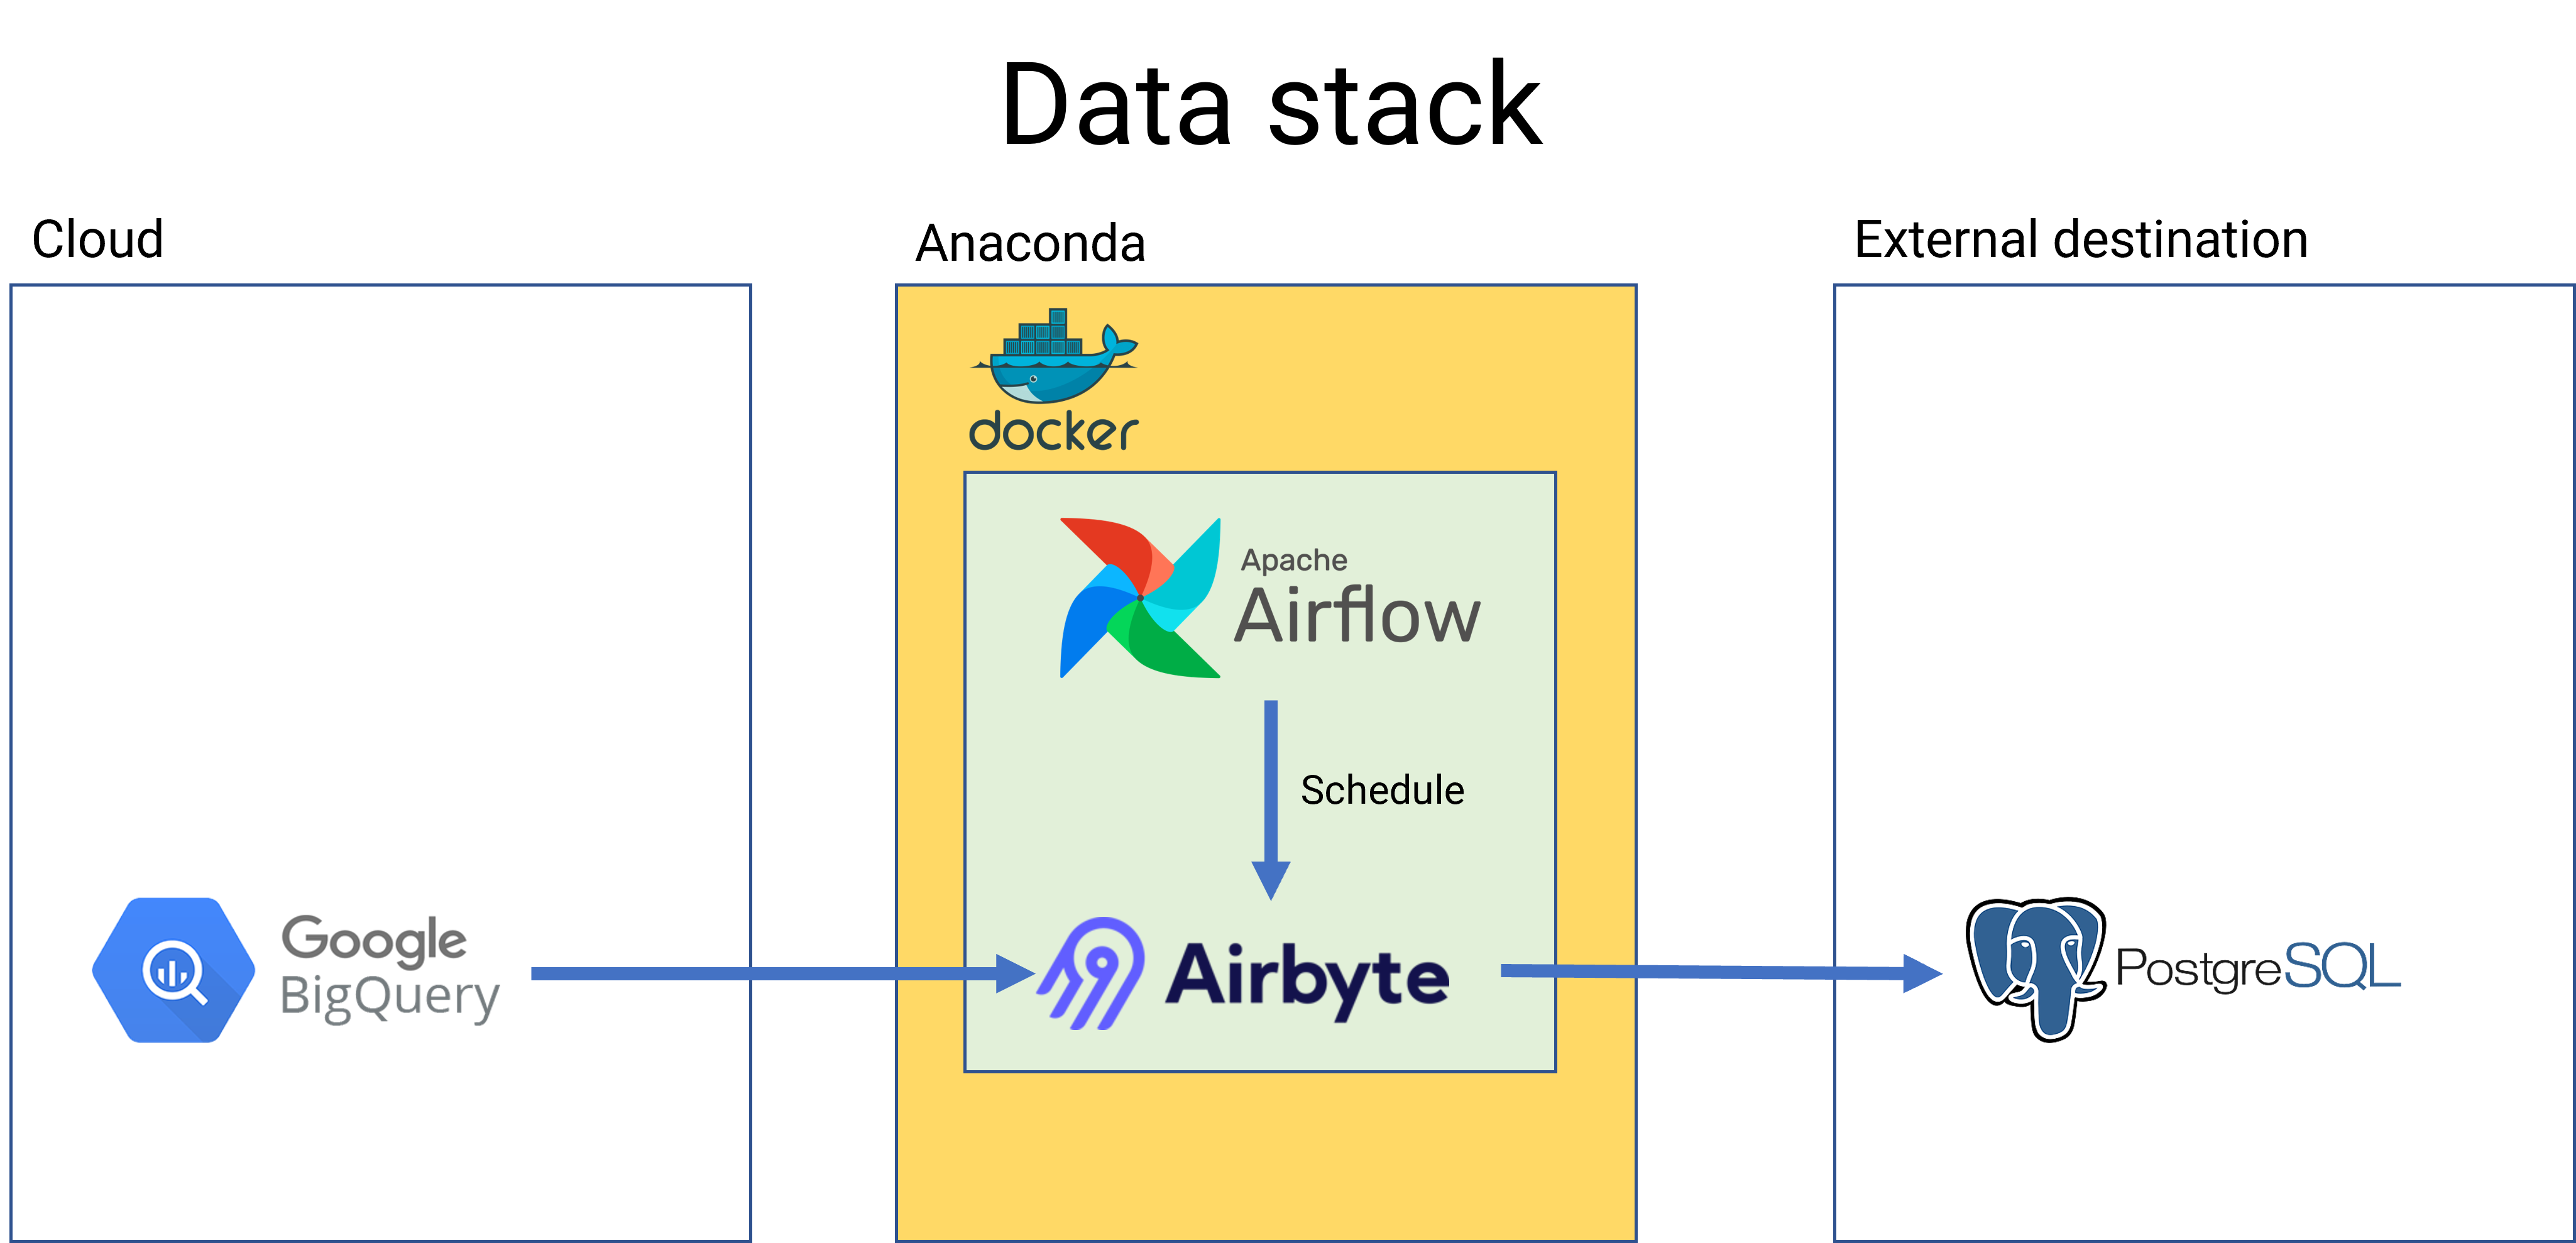
The tutorial shows a step-by-step instruction for building a complete data pipeline from BigQuery to Postgres. First, I will present how to prepare environment. Second, I will implement a connector in Airbyte to extract and load datat and a DAG in Airflow to trigger Airbyte events. Finally, I will test the proposed system with several datasets to evaluate the performance of the system.
I. Preparation
Before diving into the process for building a data pipeline in Airbyte. We need to prepare the environment for the application. According to different operating system, we have associated approaches for preparing environment. In my case, I will explain how to preparing the environment for data engineer in Windows.
1. Python virtual environment
The Linux-based computer can execute Python script directly, whereas the Windows-based need to create a virtual environment for Python executing. There are different approaches for creating virtual environment on Windows, I recommend Anaconda for fast and convenient approach. You can find how to install Anaconda at Anaconda Homepage.
2. Docker
Docker makes software development faster, easier and safer when it simplify development and delivery of distributed applications. You can find how to install Docker in Windows here
3. Apache Airbyte and Airflow
There are many ways to install Apache Airbyte and Airflow at our official homepage. You can walkthrough the guide and pick the best approach here. For me, I will install Airbyte and Airflow with Docker.
4. BigQuery
To operate at Google BigQuery, we need to create a service account with the BigQuery Data Editor and BigQuery Job User. After that, I generate a key that allow the Airbyte to access the BigQuery services. For the security of the application, you should manage the generated-key in a safe place.
Another thing you need to know is the sandbox of BigQuery (Free tier) does not enable the streaming data features. For this reason, you only read data from databases without writing any pieces of data. You need to use billing account to unlock more features.
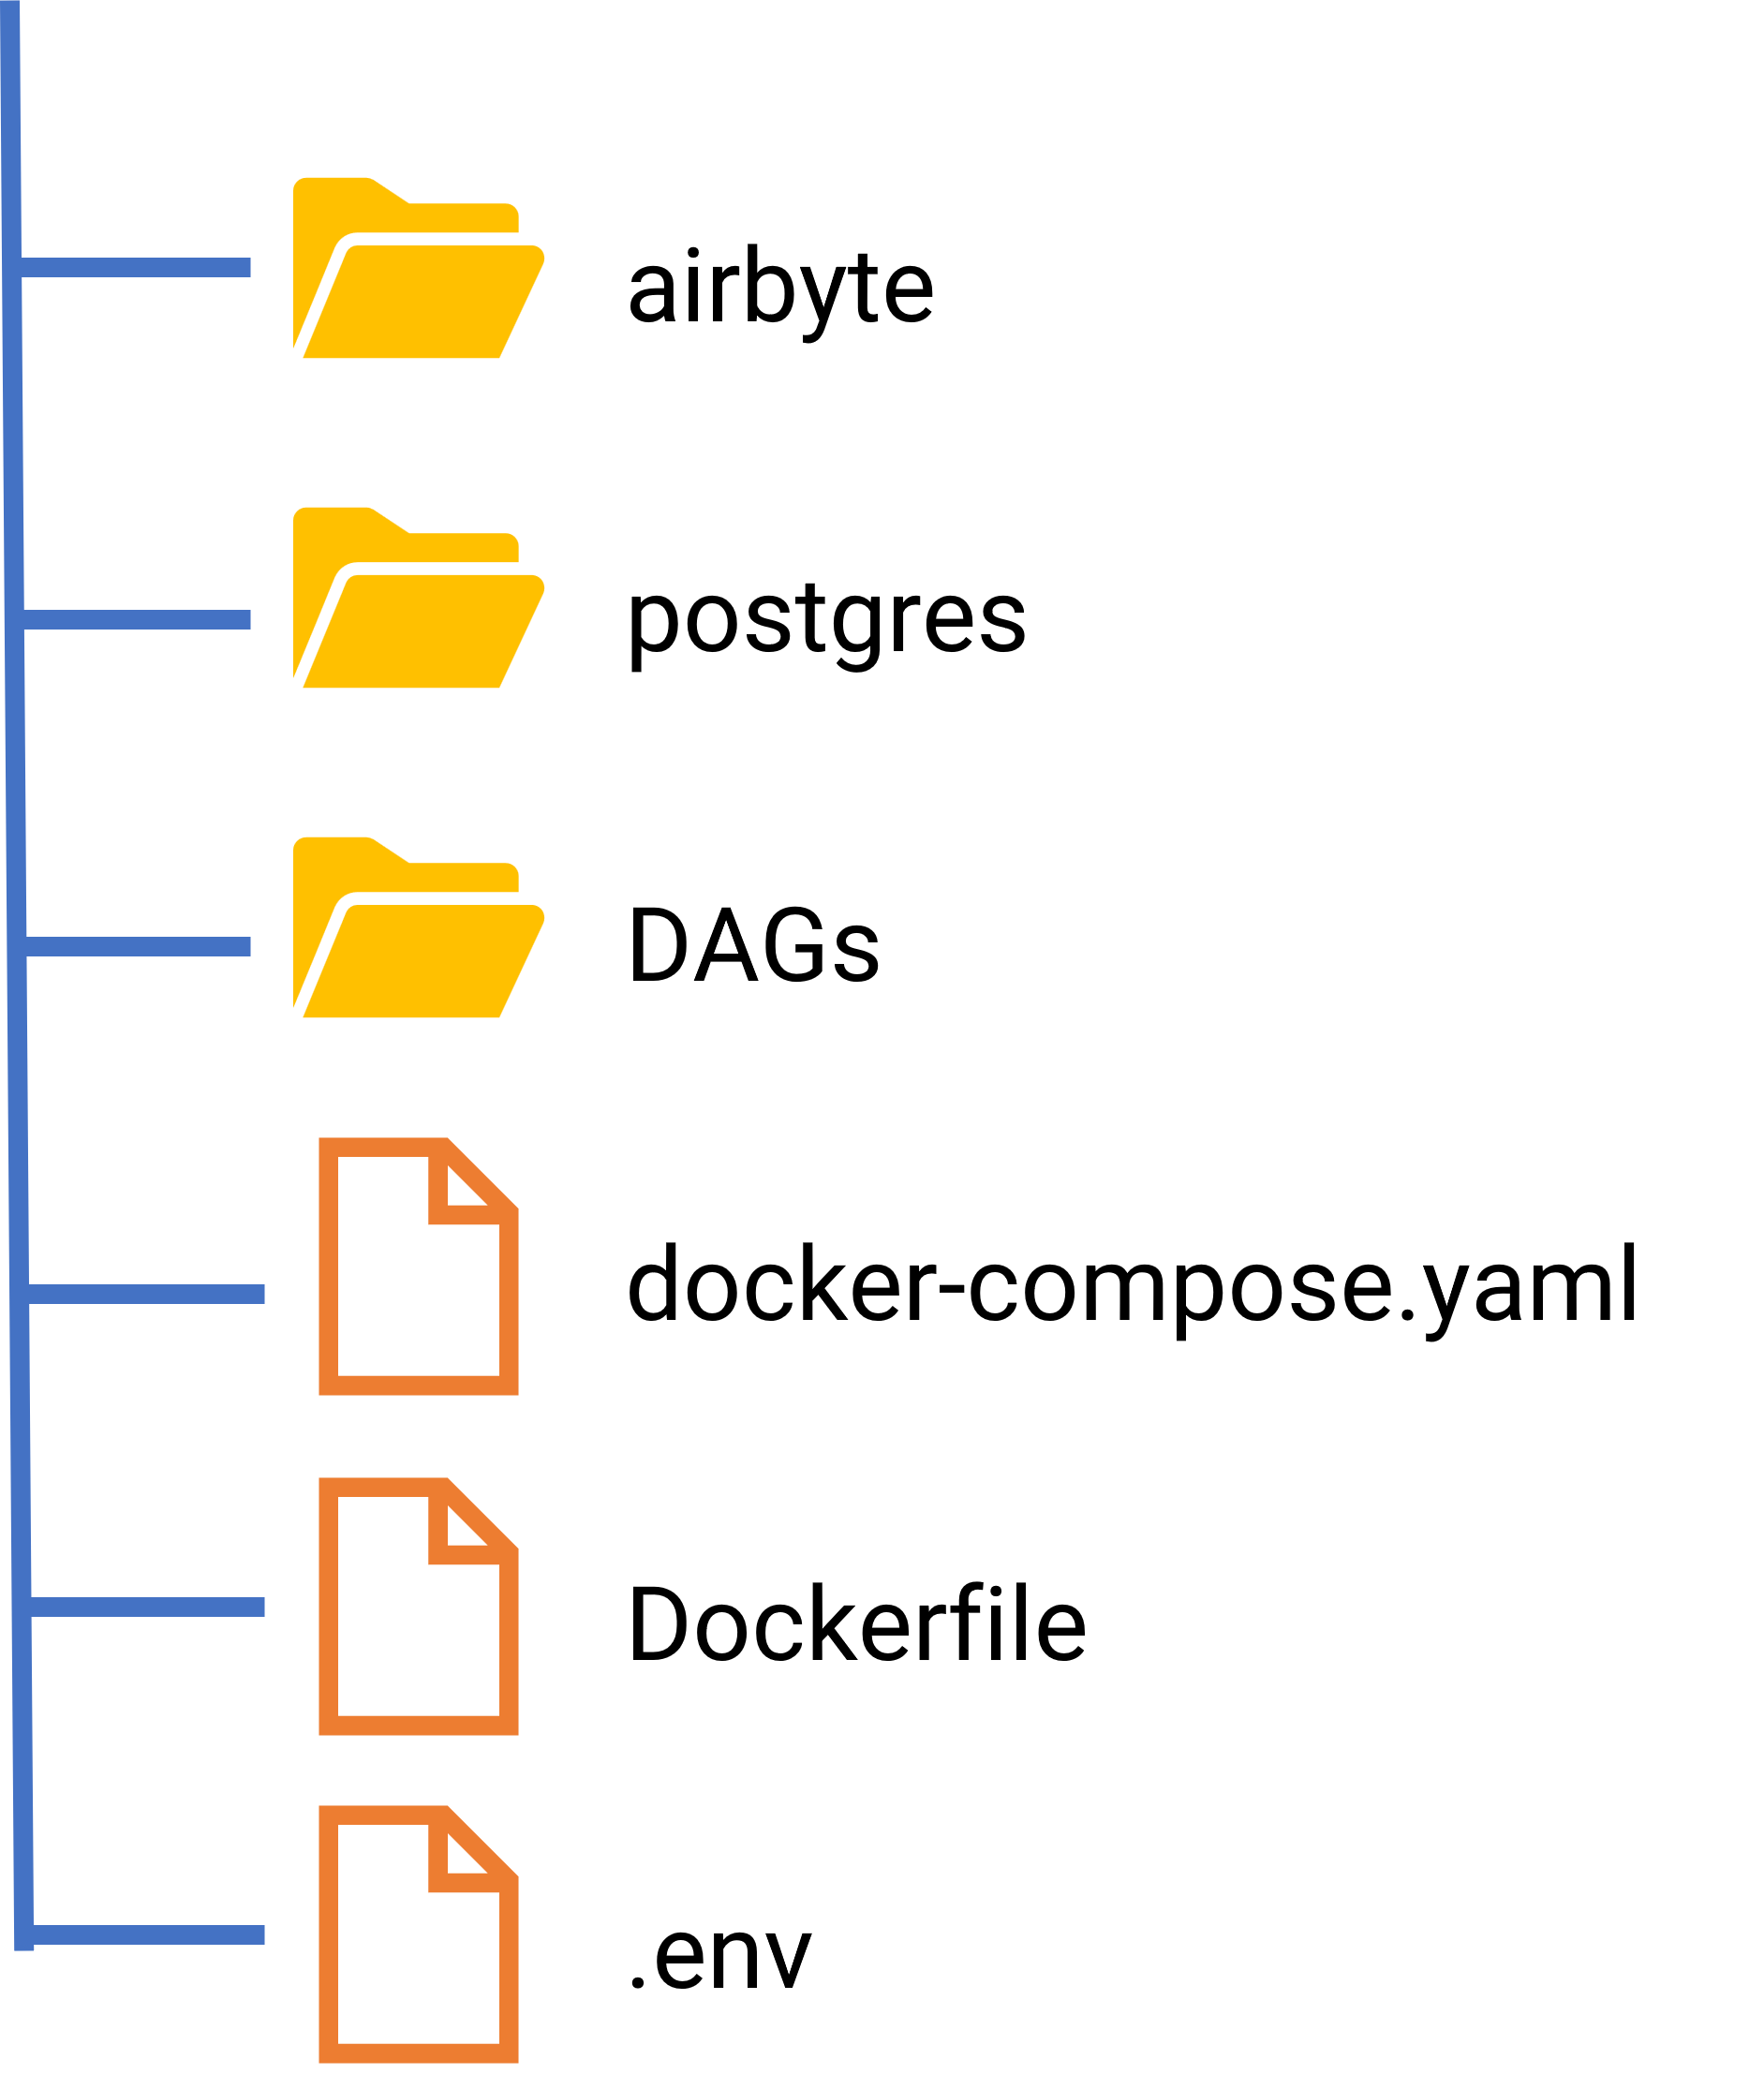
- airbyte contains the source code from the Airbyte image and you can create a new connector if it doesn't exist in the current version.
- postgres contains the configuration file to create an image in Docker for storing data.
- env define the configuration information for Airflow server
- Dockerfile allow us to custom existed image to build a product-based Airflow.
II. Data Pipeline
Running Apache Airbyte and Airflow in Docker
# Start Apache Airflow server and worker
docker-compose up

# Start Apache Airbyte server and worker
cd airbyte
docker-compose up
Creating a connector from BigQuery to Postgres
You can create a new connection through Airbyte UI at localhost:8000.
- Click + New source in the Airbyte UI
- Select source type BigQuery
- Set Project ID with the Google Cloud Project (GCP) that you created
- Set Dataset ID with the dataset that you created in BigQuery. In my case, I will call AdventureWork
- Set Credentials JSON with the generated-key in GCP. You need to ensure that it is granted BigQuery Data Editor and BigQuery Job User role at the project.
- Click Test connection to check the connection and move to next step if everything work perfectly.
- Click + New destination in the Airbyte UI
- Select destination type Postgres
- Set Host according to your environment. For example, in my case, the Postgres is located in my computer and I will set host = host.docker.internal. If your database is assigned with a public IP, you can put the ip address in this fields.
- Set Port=5432 or change the value with any port you would like to change.
- Set DB Name=AdventureWorkStage
- Set User that is granted to access the destination database. In this step, you should not use Admin account because it create security problems in the operation. To avoid the problem, you can create a new user called Data Editor in the database and grant necessary roles for the user.
- Click Set up destination and move to the next step if everything work perfectly.
Before creating a connection from defined source and destination, we talk a little bit of load mode that is supported by Airbyte.
| Full refresh | Value-based incremental | Log-based incremental | |
|---|---|---|---|
| Database | Support almost databases and even flat files such as CSV | Relational databases | Only support if the source is one of the source including Postgres, MSSQL, and MySQL |
| Speed | Slow when the source has significant amount of data | Faster than Full refresh mode | Nearly realtime |
| Source requirement | No requirement | Require to have a field that shows the change in the record. Impossible to implement if the source do not have the field such as updated time | No requirement |
| Schema-change detection | Can detect when having the change in schema | Cannot automatically detect and require to manually update the schema in Airbyte | Cannot automatically detect |
| Data lost | No | Yes if the schedule does not sync according to data changes | No |
| Delete operation detection | Yes | No | Yes |
You need to check your need before implementing a data pipeline and pick the best sync mode for your problems. Fortunately, Airbyte allow us to apply sync mode on each table and you can build different approaches for each table according to your requirement.
Creating communication channel between Apache Airbyte and Airflow
To perform the action, we use Airflow UI at localhost:8080
- Click Admin -> Connections -> Add button in the Airbyte UI
- Set Connection ID=airbyte_conn
- Set Connection Type=Airbyte
- Set Host=host.docker.internal
- Set Login and Password to ensure that the Airflow has the ability to connect to Airbyte.
- Set Port=8001
- Click Test to check the connection and move to the next step if everything work perfectly.
Creating a DAG to trigger Airbyte connection from Airflow
To schedule the EL (Extract-Load) operation from AirByte, we define a DAG to trigger the defined action.
First, we will import necessary packages and libraries
from airflow import DAG
from airflow.providers.airbyte.operators.airbyte import AirbyteTriggerSyncOperator # The package to trigger action in Airbyte from Airflow
import datetime as dt
from airflow.utils.dates import days_ago
Next, we will define a new DAG
# DAG id is unique value and should include version for code review and testing
with DAG('data_pipeline_v1',
    description='Load data from BigQuery to Postgres local',
    default_args=default_args,
    schedule_interval='@daily'
) as dag:

    task1 = AirbyteTriggerSyncOperator(
        task_id='bigquery_to_postgres_task',
        airbyte_conn_id='demo_data_pipeline',
        connection_id='ec40c21f-0a41-4379-9ef6-4b47a29468bd',
        asynchronous=False,
        timeout=3600,
        wait_seconds=3
    )

    task1
Finally, we need to rebuild the image of Airflow because the base version does not include Airflow-Airbyte-Operator features. You can execute the error message if you do not perform this step. We create Dockerfile in the master folder and add the package.
FROM apache/airflow:2.5.0
RUN pip install --no-cache-dir apache-airflow-providers-airbyte
Rebuild the image and run new container in Docker. Everything work perfectly and you can test the defined DAGs in Airflow UI.
III. Conclusion
In this tutorial, we know how to build a simple data pipeline to EL (Extract-Load) from GCP to databases with Apache Airbyte and Airflow.
Comments